How to Organize Files
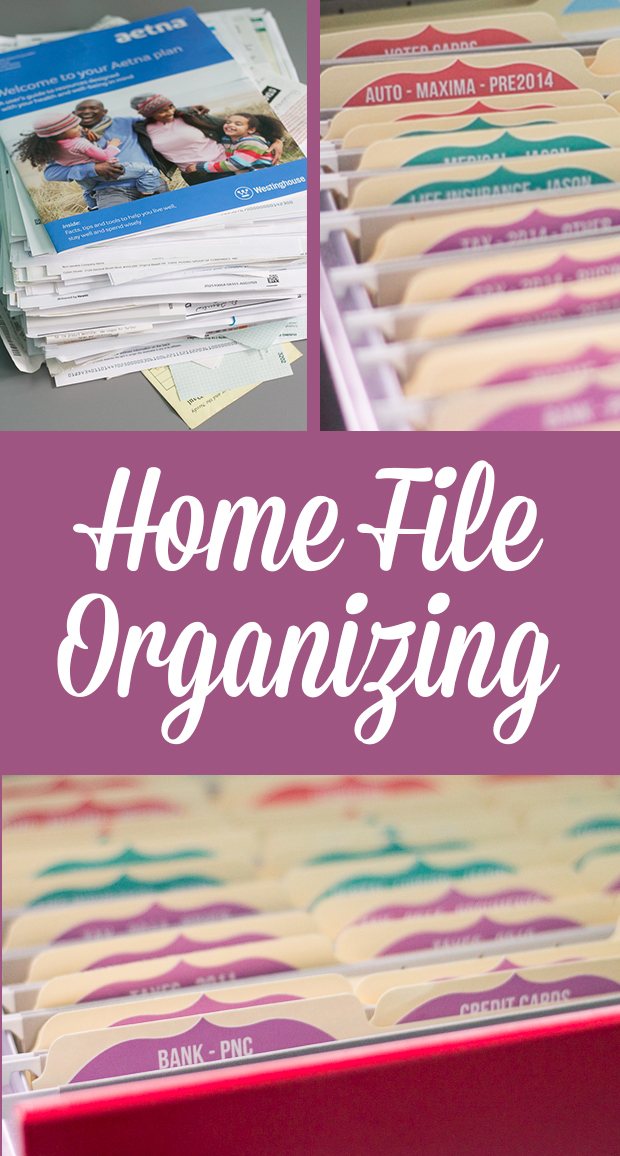
I recently tackled a major home filing system overhaul. It was a big project (and it’s not quite done), but I’m so glad to have it completed.
Step One: Gather Papers
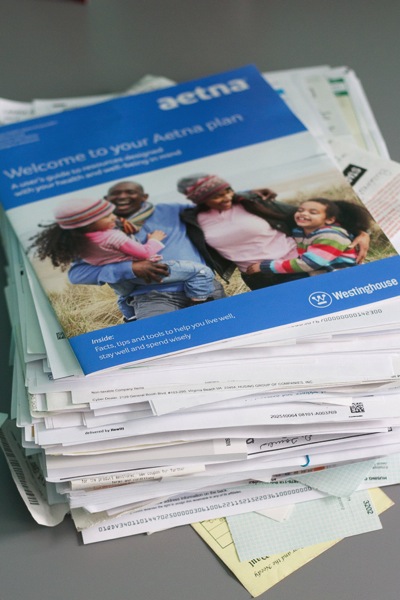
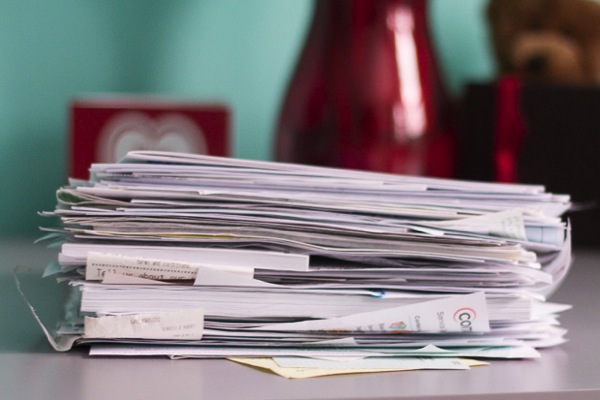
The first step for me of gathering all the papers I needed to file was actually super easy. At the beginning of last year, I knew my file system needed a major overhaul. We’d had a lot of life changes, and it just wasn’t working for me anymore. Therefore, instead of filing anything I just threw it into a bin until I got around to overhauling my files. It’s now over a YEAR later when I’m finally tackling the project! Therefore, I had a huge, scary stack of papers that needed filing (or purging), but at least they were all contained in one bin. Isn’t this picture just plain scary?
Step Two: Determine Your File Structure or Categories
This was by far the most difficult and painful part of the process for me. I knew that what I had really wasn’t working, but I felt stuck on how to proceed. What file categories do I need? How should I organize them (all in alphabetical order or by some sort of sections)? How specific or general should I be? Should my car info file be filed under “car” or “vehicle” or “auto” or what? It’s important to realize that there are no right or wrong answers to this. There’s no perfect way to name your files, so I would advise not to get caught up in trying to make it perfect.
Honestly, when I sat down to do this part, I just stared at my existing files for a few minutes. Then I opened an Excel sheet and saved the blank sheet with the title I wanted. Then I really “needed” a snack, so I ran off to get that. Then I “needed” a shower (even though I’d already had one that morning – yes I was truly that stressed about finding the perfect file structure), so I ran off to do that. Then I came back and stared at the files a little longer. Then I called my mom to complain about how hard this task was see if she had discovered the absolute perfect filing system since I last talked to her. Then I FINALLY told myself it wasn’t going to be perfect, and I just had to get something done!
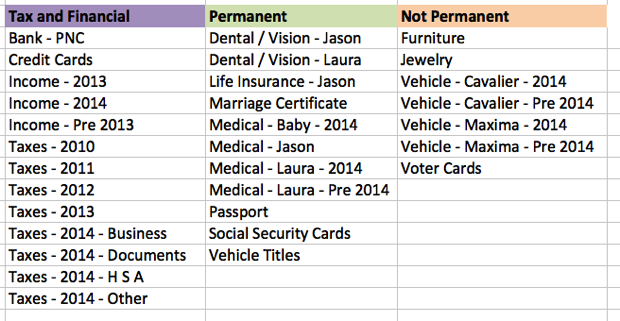
Here is exactly what I came up with, but I don’t think this would work for everyone. It’s important to find what works for you and the way you think. Also, it’s important to note that all my bills are already taken care of in my finance binder. You can see a detailed tour of my finance binder here.
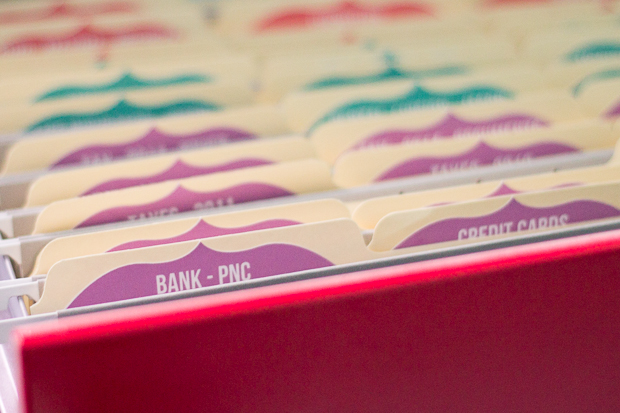
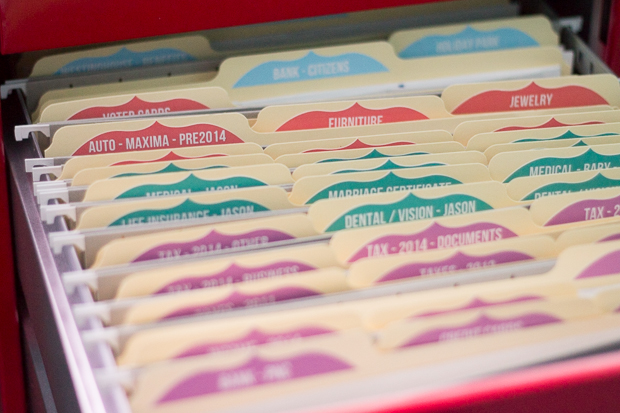
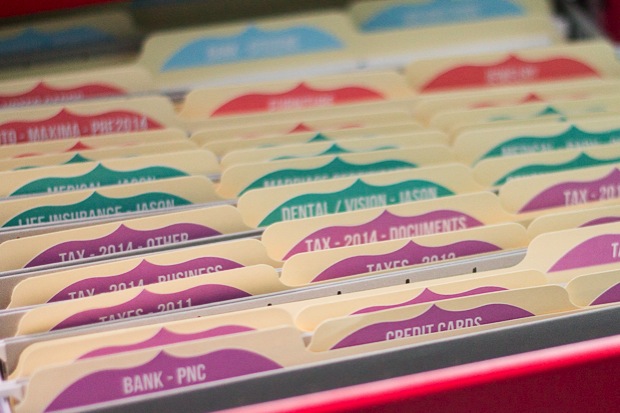
The first category is Tax and Financial, and those labels are purple. This is pretty straight forward. For previous tax years, I’m lumping everything into one file folder (and this is how it is in my current files so it’s super easy to transfer). For the current tax year, I’m separating things out a little more. Once taxes are filed for this year, I will probably lump it all into one folder again and create more detailed folders for the current year. Also, all of my bank and credit card statements are online, so there’s not a lot that needs to go in those folders. Most of these folders will need to be kept for seven years, and then I can shred the contents.
My second category are items that need to be kept permanently or indefinitely. This includes our medical records, life insurance policy, marriage certificate, passports (although I realize I probably don’t need to keep my old passport once I get a new one but I do anyway), social security cards, and vehicle titles (although I realize these won’t be kept once the car is sold).
The third category is called “Not Permanent” which just means items that will be replaced when something new comes in. Furniture and jewelry are receipts and warranties only for nice jewelry and nice furniture. Most of my furniture is from IKEA or yard sales, so I don’t save those receipts for too long. I’ll throw out vehicle records when we sell the vehicle.
Step Three: Create Your File Labels
This is the fun part of the project especially for a label fanatic like myself!! I had a blast creating new file labels. I drew the design myself (on the computer – not on paper), printed it on an 8.5 by 11 sheet of Avery sticker paper, and then cut it with the Silhouette machine (using the print and cut feature).
I used the removable sticker paper, so that way I can just take the label off the folder and reuse the folder. Also, I like the removable adhesive because it’s a lot easier to apply. If it’s not on straight, you can just peel it off and stick it back on. I’ve used this kind of adhesive paper a lot and never had a problem with it coming off even though you can pull it off.
Step Four: Set Up Your Empty Files
Next, I took all the files out of my cabinet. Then I put the labels on new file folders and put them in the cabinet. From there, I took the old files and transferred over the contents to the new files. This only took about five minutes, since I kept a lot of the same files on purpose so I wouldn’t have to do much a shuffling around. Things I didn’t need I just stacked in a “to shred” pile.
Step Five: Fill your Files
Next, I took the huge stack of paper and started filling the file folders. Anything I didn’t need I just put in a “to shred” pile. If I really wasn’t sure what to do with something, I put it in a stack and dealt with it at the end, so I didn’t get completely bogged down. This is the part that's not completely finished yet.
A Few Notes
I already mentioned where all my bills are kept. I’m throwing away utility bills from previous years. I do have records of how much we paid each month which might be useful in the future if we sell our house. (Note: I’m not a financial or tax person, so I’m not saying this is what you should do! I’m just being completely honest about what I do.)
I don’t really save many receipts. I used to, and it was a little ridiculous to save every single receipt. I save receipts for things I might return and things we need for tax purposes.
I have all our home related papers in another spot. That includes everything we got at closing, our loan documents, and our homeowner’s insurance policy. This is in part because some of the documents are legal sized and don’t fit in the file cabinet. All those documents are in one spot in a decorative box, and I know right where they are if I ever need them (which is rare).
I don’t file manuals. I just keep those all in one bin. I’ve thought about creating a sophisticated organizing system for them, but I honestly almost never use them, so I think that would be way overkill. Home appliance warranties are in my house box, since we’d need them if we sell the house.
How do you organize you files? Did you stress about determining the categories as much as I did?






 Copyright 2024, Get Organized HQ.
Catherine Says
Thank you!!! When you posted about your updated file system yesterday I hoped that you would share the how-to’s with us! 🙂
LauraJane Says
Post authorYou’re welcome. Hope the how-to’s are helpful.
Jakita Says
Hi, where can I get the stickers shown on the folders in the pic?
Thank you!
LauraJane Says
Post authorI made them using my Silhouette Machine.
Gail Says
Could you please elaborate on how you made your stickers please?
Are they plain colored sticker sheets that you cut out?
How did you design your own and then cut your own design? I don’t have a machine but am considering getting one.
Did you print the names on the full sheet using a template for labels and then cut them?
Sorry for the confusion but I’d love to try it, thanks!
Tasha Whitsitt Says
These labels were made with a die cut machine. A Cricut or a Silhouette either one would make these labels.
Natascha Says
Oh I love how pretty these are!
I just use ugly plain ringbinders… But they work good for me. I have one large and two smaller ones for different bank / financial things, one for Health Insurance, one for Phone & Internet and Mobiles, one for the Car, one for Workstuff Husband, one for my Workstuff, one “Misc”, one for our daughter and one for our House & Utilities.
LauraJane Says
Post authorThanks, sounds like you have a good system that works, and that’s the important part.
claire stone Says
Wow. This is one of the most useful posts ever. I will sit down at the weekend and copy you!!!!
Thank you for making it all seem so clear and easy!
LauraJane Says
Post authorGlad you found it useful!! Hope you make lots of progress!
dawn Says
Reading this post just gave me a total sense of relief. I have a box in front of my file cabinet that is full of my ‘to be filed when my system is better’ stuff. I thought I was the only one. It is like a green monster that stares it’s glowing eyes at me every time I walk past it. It has become overwhelming. Your post has given me hope. I may even try to tackle it this weekend although I’m sure I’ll get hungry and need a shower, and coffee, and then lunch……
LauraJane Says
Post authorYes, you’re definitely not alone! It is a like a growing monster. Good luck tackling the box. You can do it! The hardest part is just getting started.
Raquel @ Organized island Says
Laura I love these file labels that you made from your Silhouette! Beautiful and so nicely organized!
LauraJane Says
Post authorThanks! I love making things with my Silhouette – I’m always dreaming up new things to create with it.
Linda Says
For warranties and manuals, I file them by room. Like you said, you don’t refer to them much, but if I need info about my toaster, I know it’s in the kitchen file.
LauraJane Says
Post authorThat’s a great idea for filing manuals.
Ava Says
I love how you had three main categories of Tax/Financial, Permanent, and Non-Permanent! I do my file re-organizing and purging around this time of year in preparation for having our taxes done, and I will definitely keep those categories in mind! I keep most of our very important papers in a safe; everything else in a 4-drawer filing cabinet.
I have started on looking for PDF files for manuals online. There’s a website (whose name/URL I can’t remember) that has tons of user manuals. My goal is to download all of the PDF files that I can find and put them on a flashdrive or maybe store them in Dropbox — and then recycle all the paper manuals!
I love, love, love how you made the labels with your Silhouette!
LauraJane Says
Post authorLove the idea of finding the manuals online. That would eliminate a lot of papers altogether.
audrey Says
I have 2 insane tubs full of things to file that I have been avoiding like a plague. I took them into the dining room last weekend and now I’m slowly sorting them out on my dining table. You are so right. Getting started was the hardest part. I’ve got a few extra ideas from your post now. Thank you for this.
LauraJane Says
Post authorGreat job getting started! Good luck.
Lowela Says
“Then I FINALLY told myself it wasn’t going to be perfect, and I just had to get something done!” As you said earlier, this is the thought that encouraged me to get going on what I need to be doing for the moment. 🙂 Last night is rained hard and for some unusual reason I left two windows down in my car (actually the car I am borrowing from my parents with leather seats :P). I need to do the best I can to dry out the car and condition the seats. Was doing some internet procrastination but your post has encouraged me to get it done. Thanks!
kellee Says
love love love your labels….
judith Says
thanks a lot for all that inspiration and I’m so found of your labels… Here, in France, it’s difficult to find pretty stickers ! I’m willing to create my own, but that’s another project, just one more !
Cheryl Says
I have a lot if folders that have been used over and over for years. (Some close to 20 years). I have some that are the pocket type so things don’t fall out the sides. But they have been written on, highlighted and written on again and again. But instead of throwing them out and buying new, I am giving them a makeover. I have covered the tab part, which on mine goes all the way across, with plain masking tape. Then i go over that with washi tape! They look so cute and ready for another 20 years!
I am also going to try using washi tape to tape up the sides of my regular manila folders to create a “pocket”.
LauraJane Says
Post authorSounds like a great idea!
Rachel R. Says
Oh, my gosh. THAT is a “really scary” year’s-worth stack of papers? I’m not sure if I dare show you the stacks of papers *I’ve* accumulated! (I do actually have a filing *system* that works, but…the file cabinet *drawer* doesn’t. I’ve been really bad about not filing stuff because it’s such a pain to open and close the drawer. I need to just buckle down and either fix or replace it!)
I wanted to tell you, though, that those labels are beautiful, and I love the colors!
Holly Says
Love the article and the great suggestions but I had to chuckle at the pile of papers you considered ‘scary’. I wish my pile was that small!! I know that I need to go through my papers at least once a week so the mountain of papers won’t take up my entire spare bedroom!
LauraJane Says
Post authorLol, I definitely understand – those papers can add up fast.
Jen Says
So glad I am not alone! I have been trying to get organized (sorting, shredding and filing) but keep putting it off. It is Thanksgiving morning and while i am waiting for my turkey to finish thawing, in it’s cold water bath, I came across your fabulous idea. Thanks (1 of the many things I will be giving thanks for today) for doing ALL the thinking!! Oh, and I too love your filing labels. I can’t wait to get started! Wow, never thought I would hear myself say that…..LOL!
LauraJane Says
Post authorGood luck!
Paresh Says
Great Article. You have now inspired me to take a look at my old files and arrange like you advised.
Becky Says
I wonder if, for those of us who don’t have a Silhouette machine, we could use regular Avery file label paper and print a fancy design like that with the words on it. It just wouldn’t be cut out. Don’t know if that’s possible, but I’m going to try. Thank for the inspiration!
LauraJane Says
Post authorI’m sure that would be possible.
Patti Kafton Says
Not only do I have all of OUR records to keep track of, but as Guardian of our adult child AND custodian of a minor I have a ridiculous amount of filing and tracking to do and reports to provide to others. I appreciate all the help I can get in better organizing and maintaining these records!
LauraJane Says
Post authorWow, that sounds like a lot to keep track of! Good luck!
Sarah Says
Don’t throw away old passports. Last time we got new ones we were told to hang on to them in case your current passport/IDd are lost or stolen. Even if expired they still help to prove who you are.
Caroline Says
Hi, I noticed you said that you keep all your manuals in one bin. A simple way I organise these is in an expanding file, labelled by room. I attach the receipt to the manual too so i can find it if needed for warantee purposes. The kitchen has a couple of sections as there are a lot of small appliances. Then, when one item breaks, i pull out the manual and ditch it and the receipt and replace it with the new manual when it is replaced.
Kelsea Says
Can you be more specific on how you made your labels? I want mine all pretty but not sure exactly how you did it…
Thanks 🙂
LauraJane Says
Post authorAre you in the Sweet Life Society? I have a detailed video tutorial in the club about how to I made them and other pretty labels.
Alice Says
Love your labels!!! I want to join the club to learn how to make them but your club is closed for now. Before I put myself on the wait list, could you tell me if I need a color printer to print out these file labels, just love the white text! Thank you!
LauraJane Says
Post authorYou could do a grey or black background with white text with just a black and white printer.
LauraJane Says
Post authorYou could do grey or black with white text with just a black and white printer.
Gail Says
I understand they are made with a die cut machine, but I’d like to know what you did before you cut them out?
Thanks again.